
Why SafeLinx?
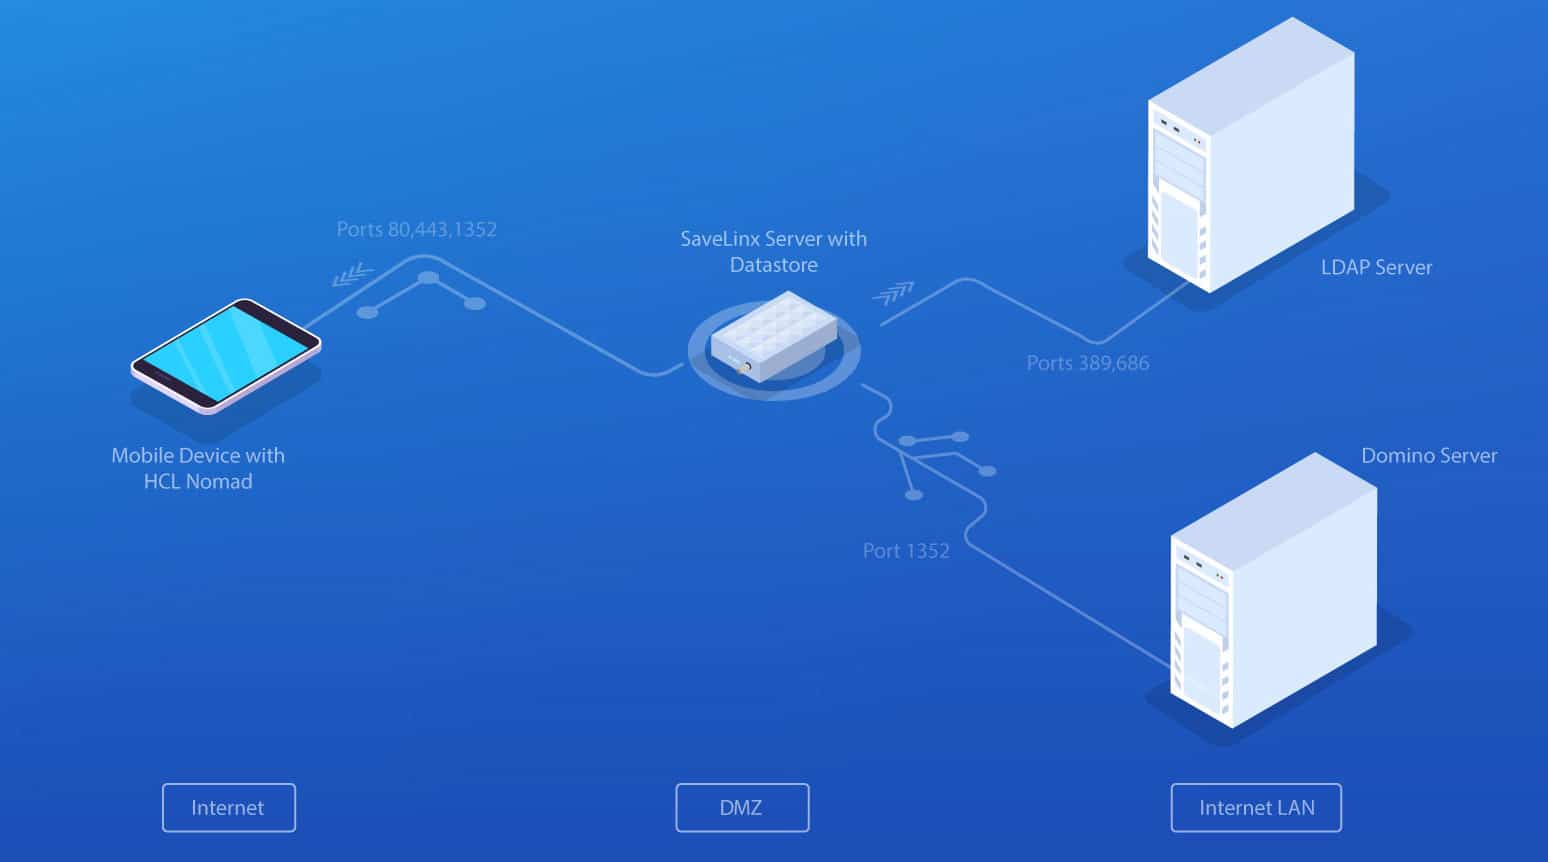
Safelinx serves as a secure access point from e.g. HCL Nomad (Notes client for mobile devices like iOS or Android) to the internal Domino server structure. SafeLinx can also act as a secure access point to the internal Domino servers for HCL Traveler or HCL Verse. It is the only reverse proxy on the market that not only securely routes through for web applications (port 80/440) but also Notes (port 1352).
SafeLinx’ content is so extensive that we want to provide you with an almost seamless step by step guide. However, due to the volume, we also felt compelled to split this into two main sections:
- the installation of a SafeLinx Server (part 1 = this post) and
- the setup of a SafeLinx Server (part 2)
Requirements
A few conditions must be met for the installation of SafeLinx. Generally speaking, these are a valid SSL certificate and a dedicated server (usually in the DMZ).
I’d also recommend having the documentation of SafeLinx 1.1 at hand as a reference just in case. You can find it at: https://help.hcltechsw.com/safelinx/1.1/index.html
What does a SafeLinx Server do exactly?
Basically, a SafeLinx Server serves as a “Reverse Proxy”, as traditionally known from a web server.
SafeLinx is also able to act as a web proxy, but in this case it accepts NRPC packets (port 1352), i.e. the Notes protocol, and forwards these packets inwards through the DMZ to a Domino server.
In addition to Nomad, SafeLinx can also serve as a central entry point into the DMZ for the following HCL products:
- HCL Nomad
- HCL Sametime
- HCL iNotes
- HCL Verse
- HCL Notes Traveler
Better still, SafeLinx can be used free of charge by HCL customers who have switched to or are already using the CCB license.
The Components
In my case I have used the following components:
| Operating System: | CentOS 8 |
| SafeLinx Server 1.1: | HCL-SafeLinx-110-x86_64.tar.gz |
| DB2 express -C: | v11.5.4_linuxx64_server_dec.tar.gz |
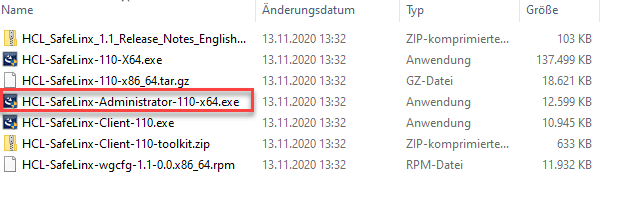
| SafeLinx Administrator: | HCL-SafeLinx-Administrator-110-x64.exe |
First though, a word about the data store used
Besides DB2, you can also use Oracle (Linux) or MS-SQL (Windows). You can find which versions exactly in the Release Notes.
When testing and/or in a small environment of up to 100 users, however, you can also work only in the file system without a dedicated data store. The SafeLinx administrator asks whether the file system should be used as the data store when started for the first time.
In this constellation, none of the above database products need to be installed in advance.
Installation DB2
It’s beneficial to have a GUI available on the Linux server to use DB2 as data store. Alternatively, it’s possible to loop through the GUI via X11 and SSH, but I didn’t want to make it too complicated here.
Installing DB2 under CentOS 8
I chose the easy option by using the suggested “Default” under CentOS8.
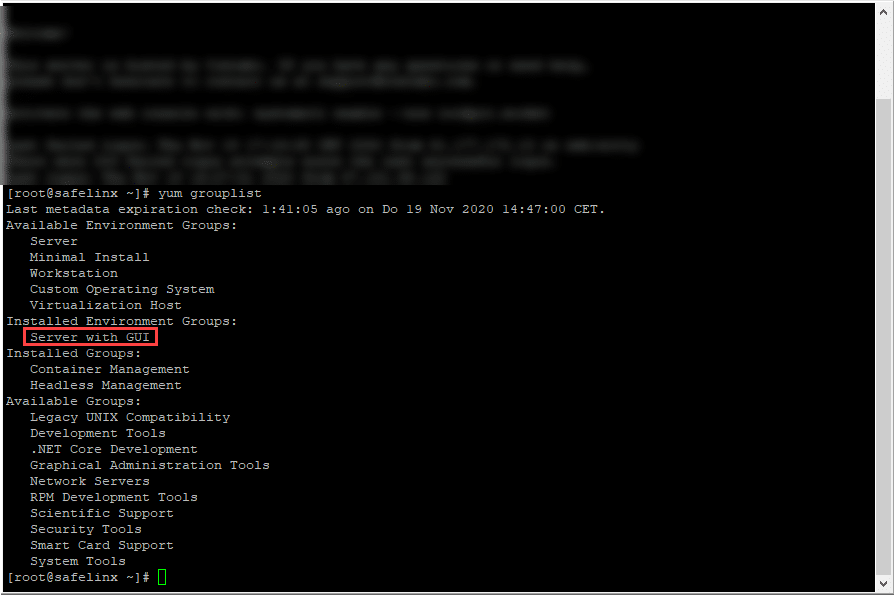
yum groupinstall "Server with GUI"Subsequently, the GUI can be started via “startx”. The installation and setup of the DB2 Express-C instance is then executed directly from the unpacked package.
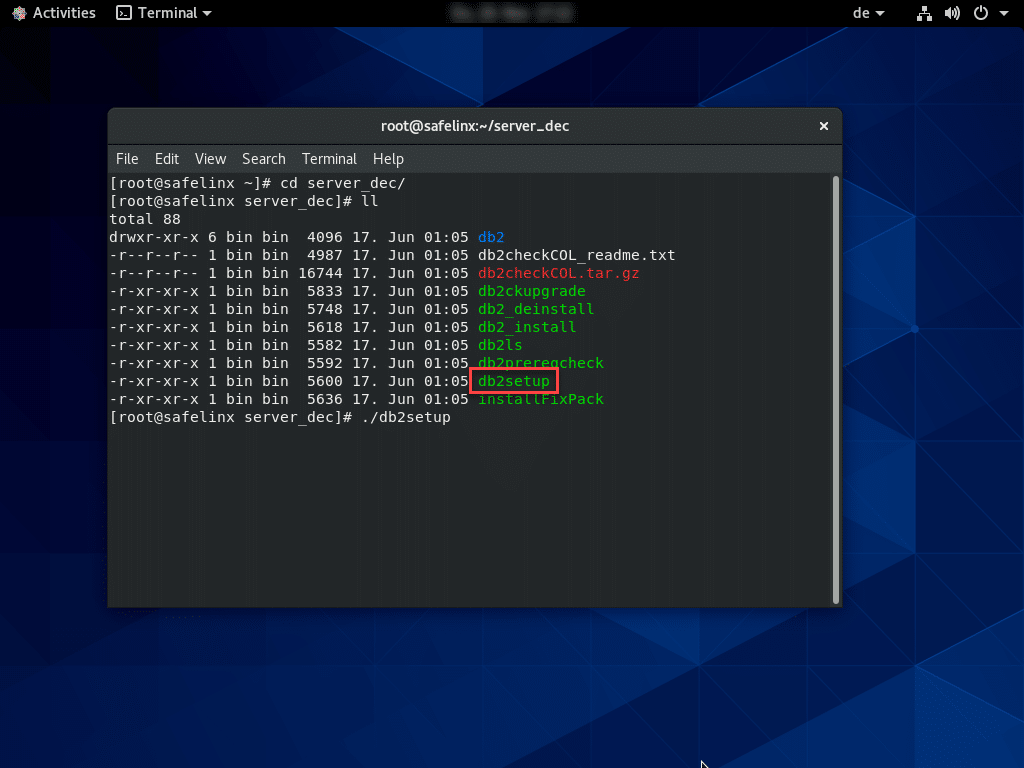
"./db2setup"starts the setup of the DB2 server. The individual steps for the installation are not very extensive and can be performed quickly.
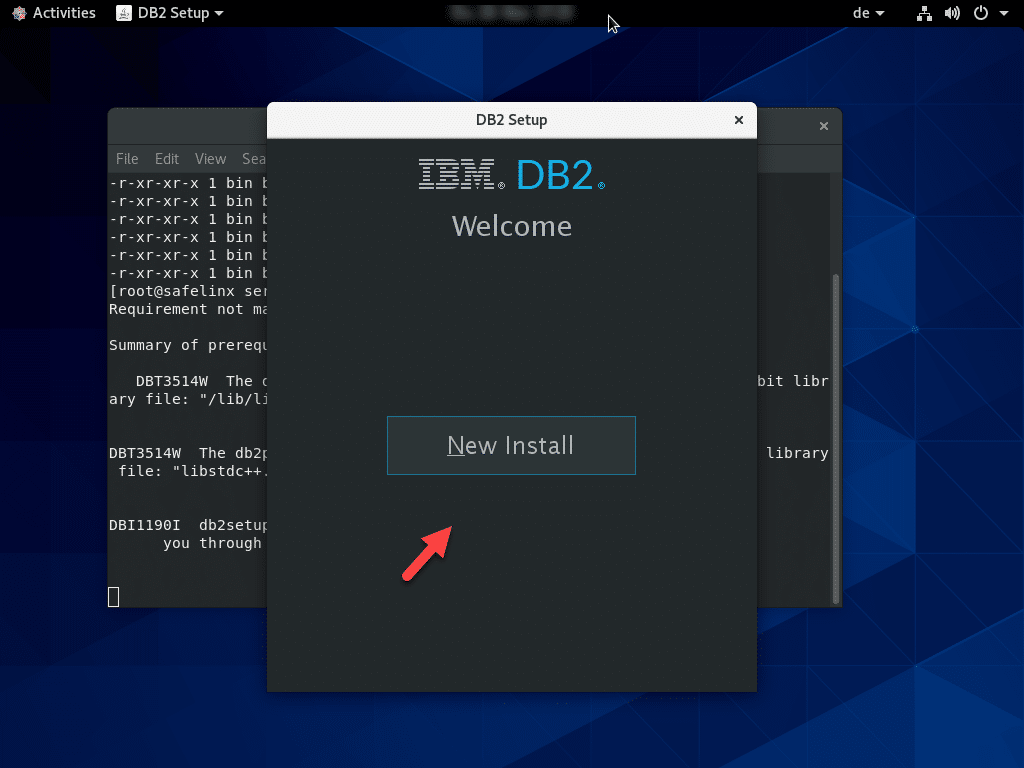
In the second step, select a typical DB2 installation.
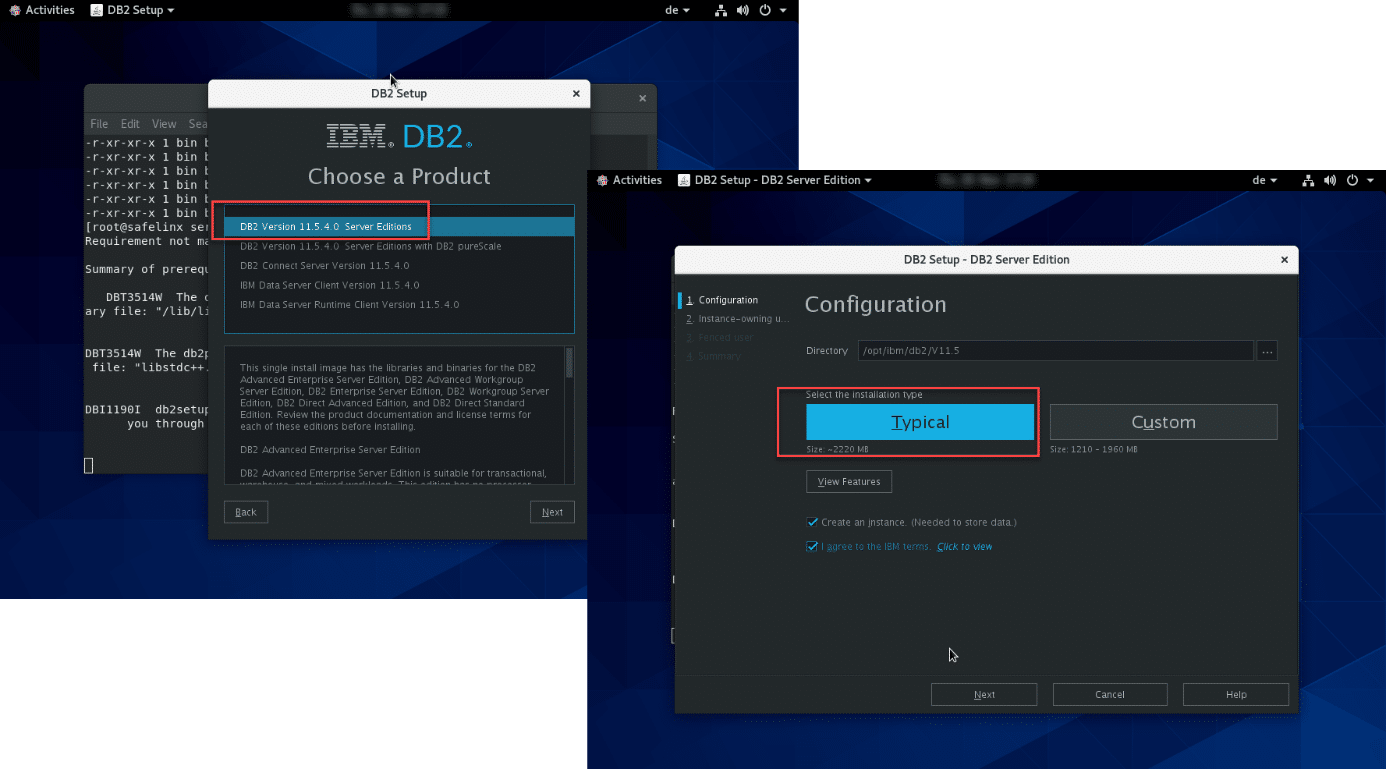
Specify the passwords for administrator users in the following two windows of the setup wizard.
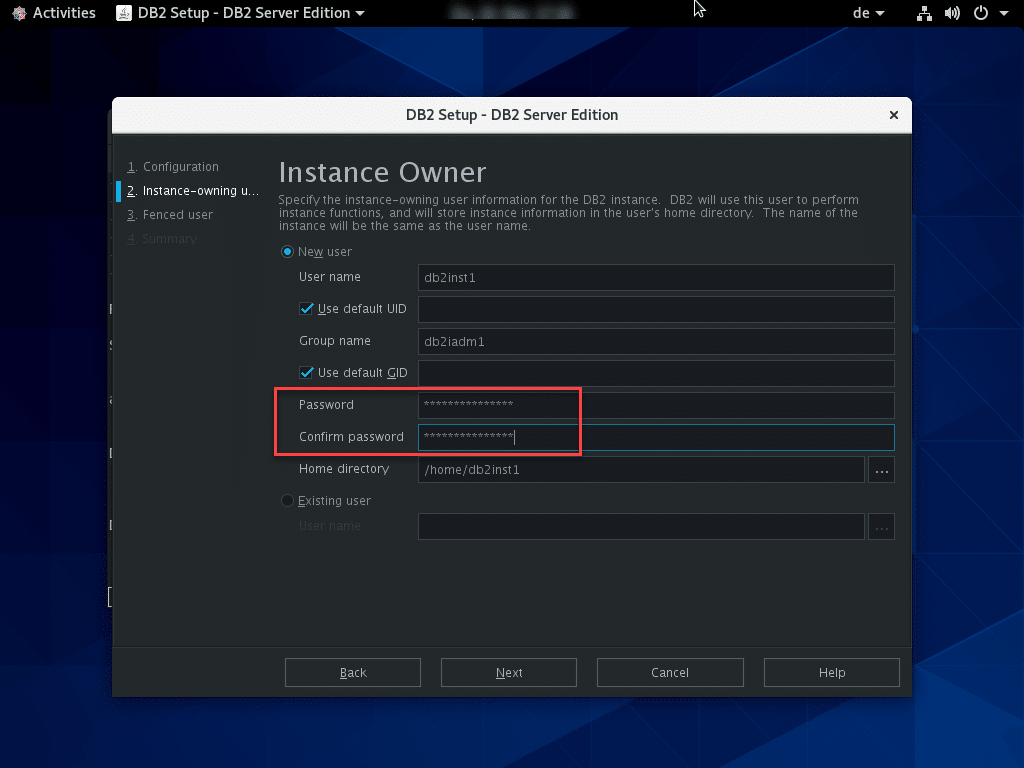

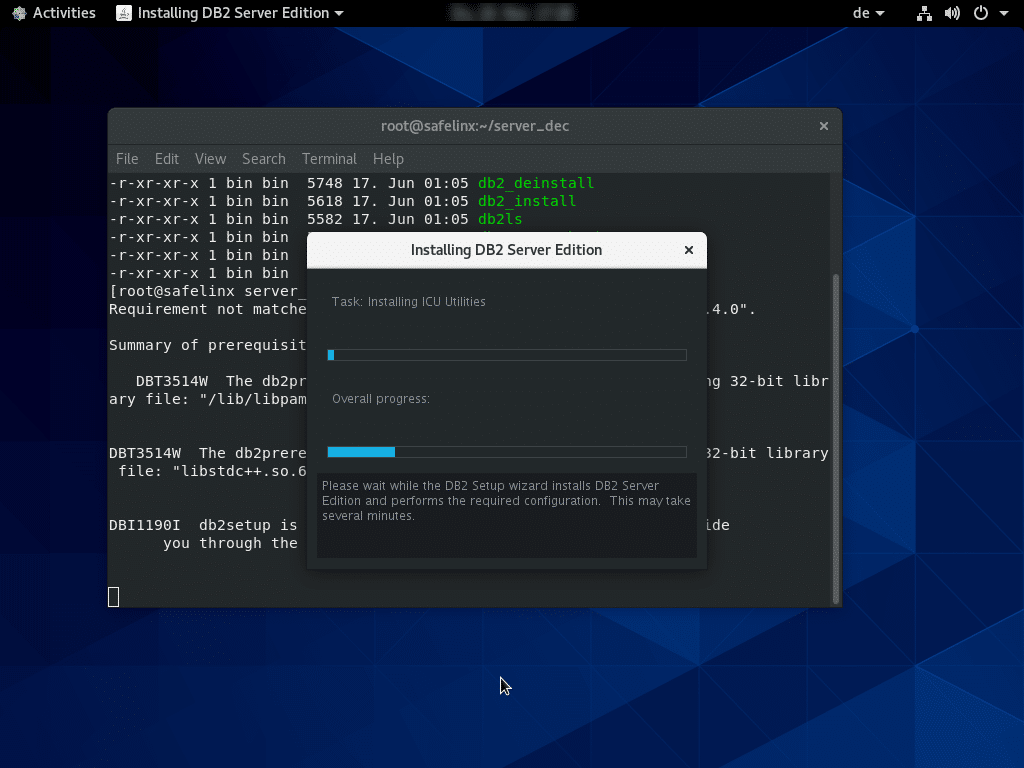
Although these passwords are not required later for the connection to the DB2 data store, they should be documented securely like all passwords. The installation itself can take some time as the package is quite large (approx. 2 GB).
Once the installation is completed successfully, we can finish this first step.
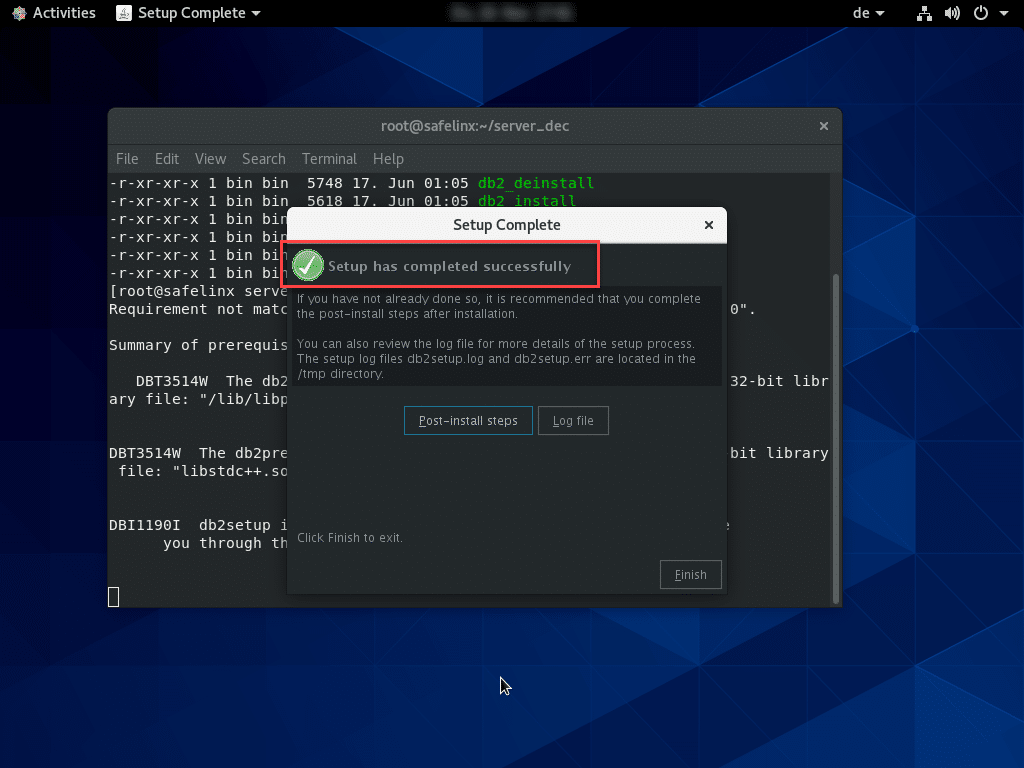
The DB2 instance is now installed and can be used immediately.
Installing SafeLinx Server (Linux)
Immediately afterward, we install the SafeLinx Server. For this, we change to the already unpacked package on the server.
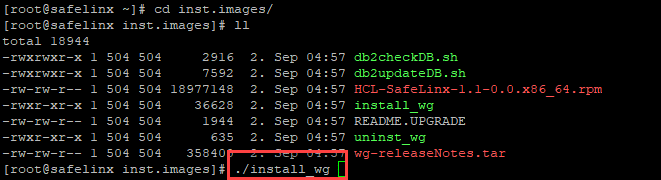
./install_wgProvided the check was successful, the installer searches for the DB2 server and indicates which version it has found.
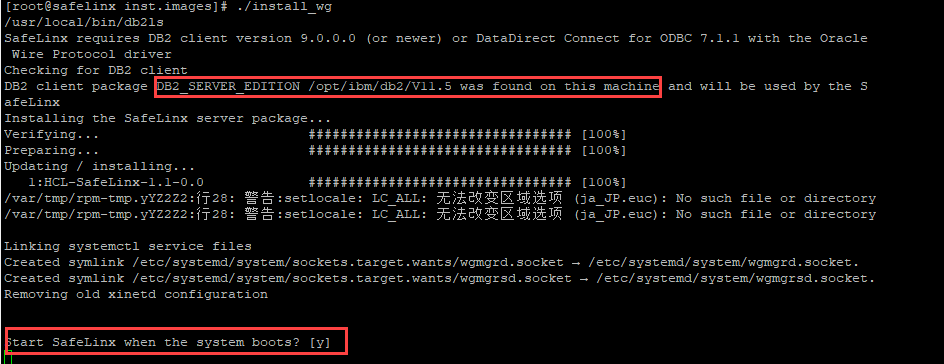
Finally, you will be asked whether the SafeLinx Server should be started automatically when booting the machine. Please confirm this with “Y”.
The installation of the SafeLinx Server and thus the central server components is now complete.
Installing the SafeLinx Administrator
The SafeLinx Administrator is responsible for the administration and handling of SafeLinx Servers. This SafeLinx Administrator can be used under Windows as well as Linux. This is a Java-based tool.
For this example, I will install it under Windows.
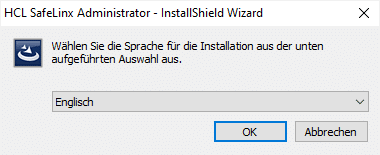
The installation is usually very fast.
As mentioned earlier, SafeLinx Administrator is JAVA based and not a regular Windows program.
As such, you don’t start an “EXE” but a batch file.
Basic setup SafeLinx Administrator
We can start SafeLinx Administrator immediately after the installation. We have to create a “Login Profile” at initial startup.
A “normal” profile must be created at initial startup. You can also use the IP address of the SafeLinx server if you do not have a DNS name for the server that can be resolved.
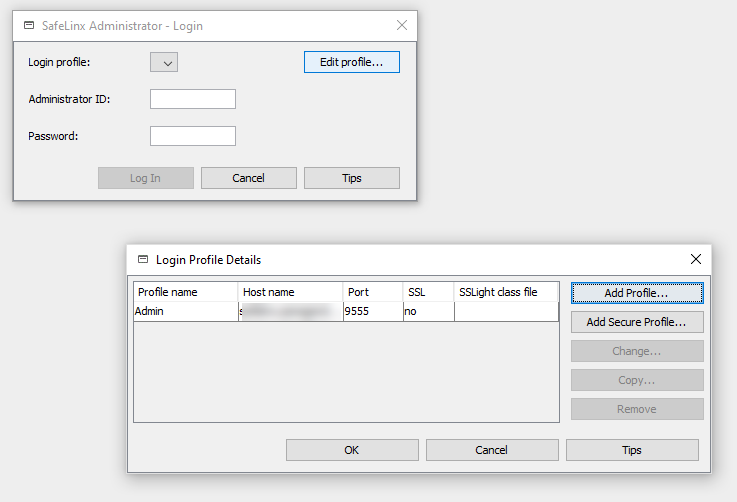
The default password is: “sl4!admin”
Unfortunately, this is not so obvious in the documentation. The username is “admin”.
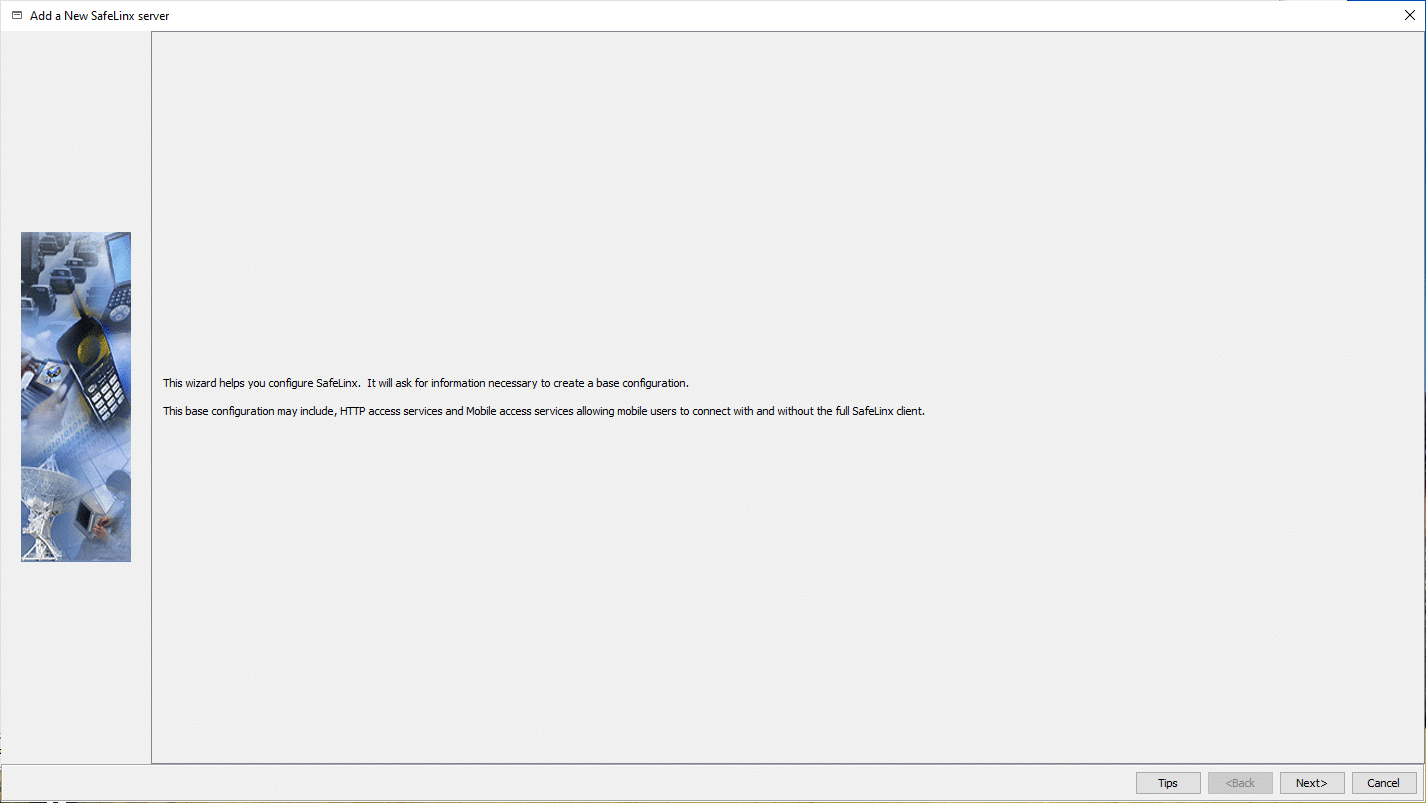
The first dialog occurs after log in where SafeLinx guides us through the basic setup.
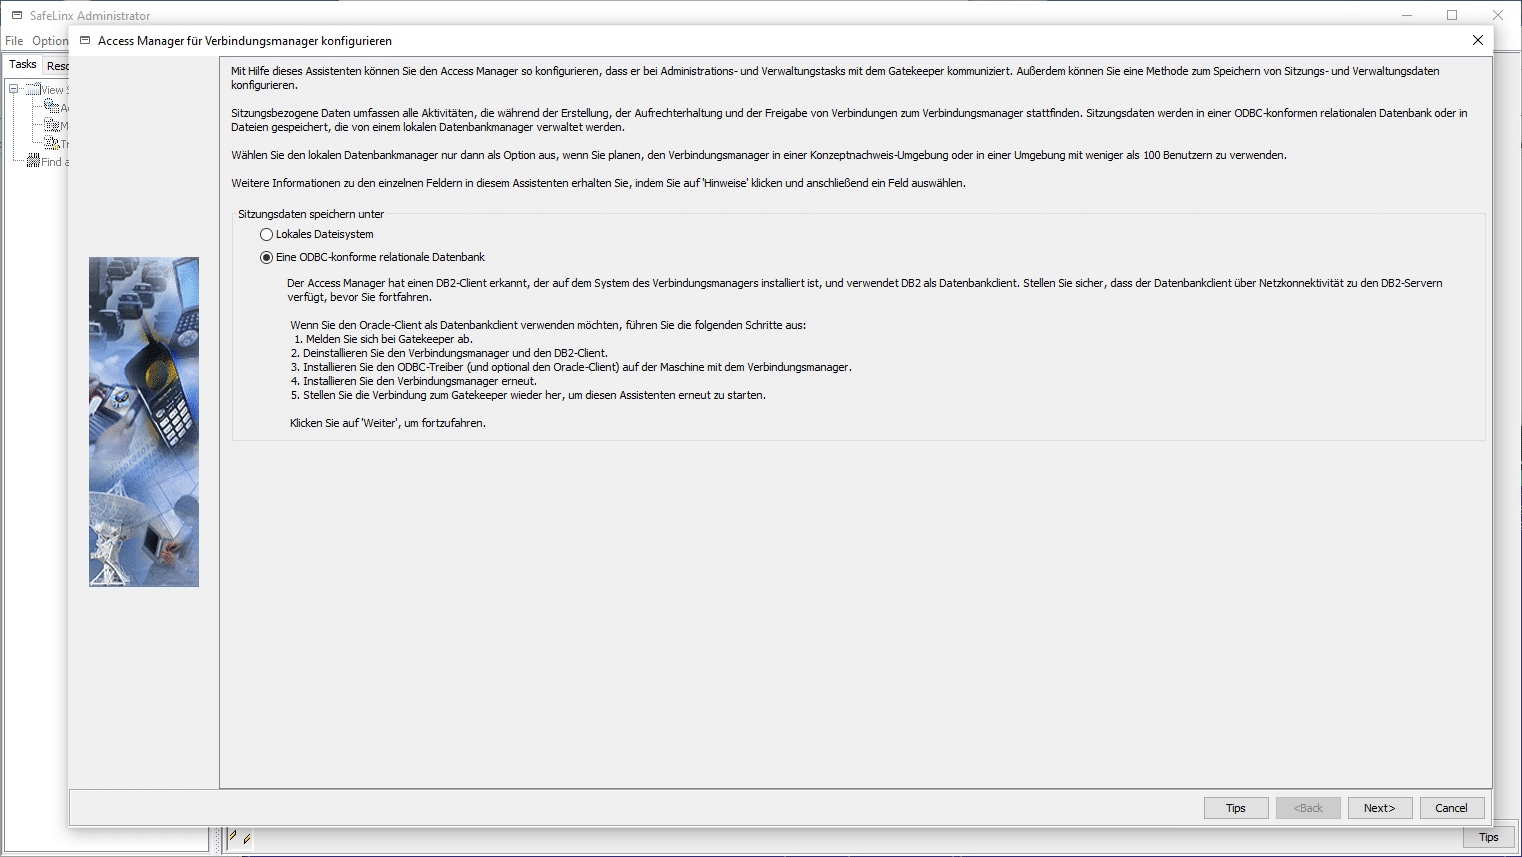
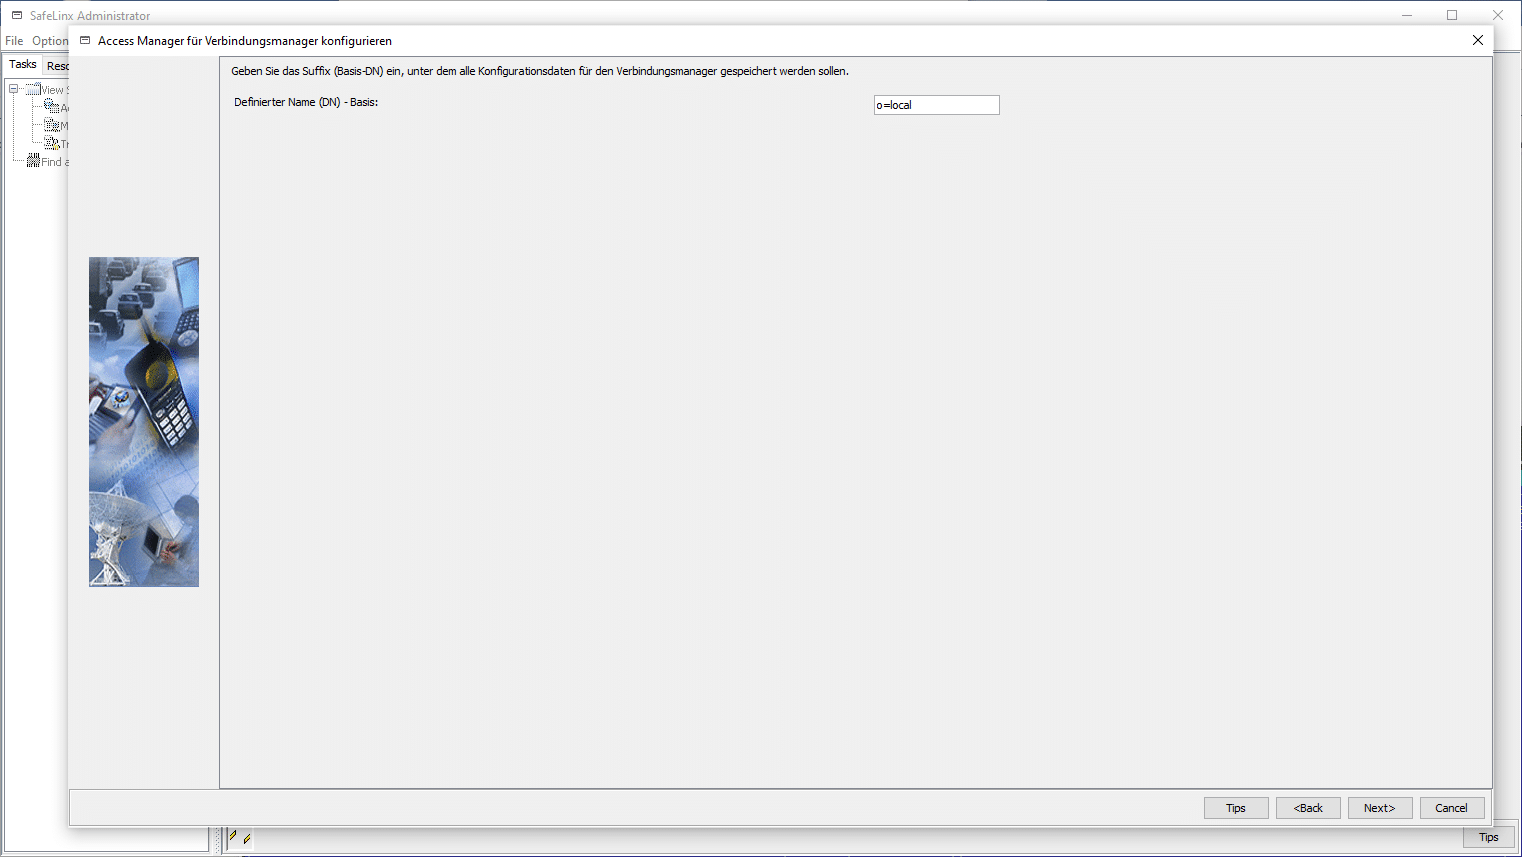
After confirmation, the data store is queried and here we select the ODBC interface for the DB2 connection.
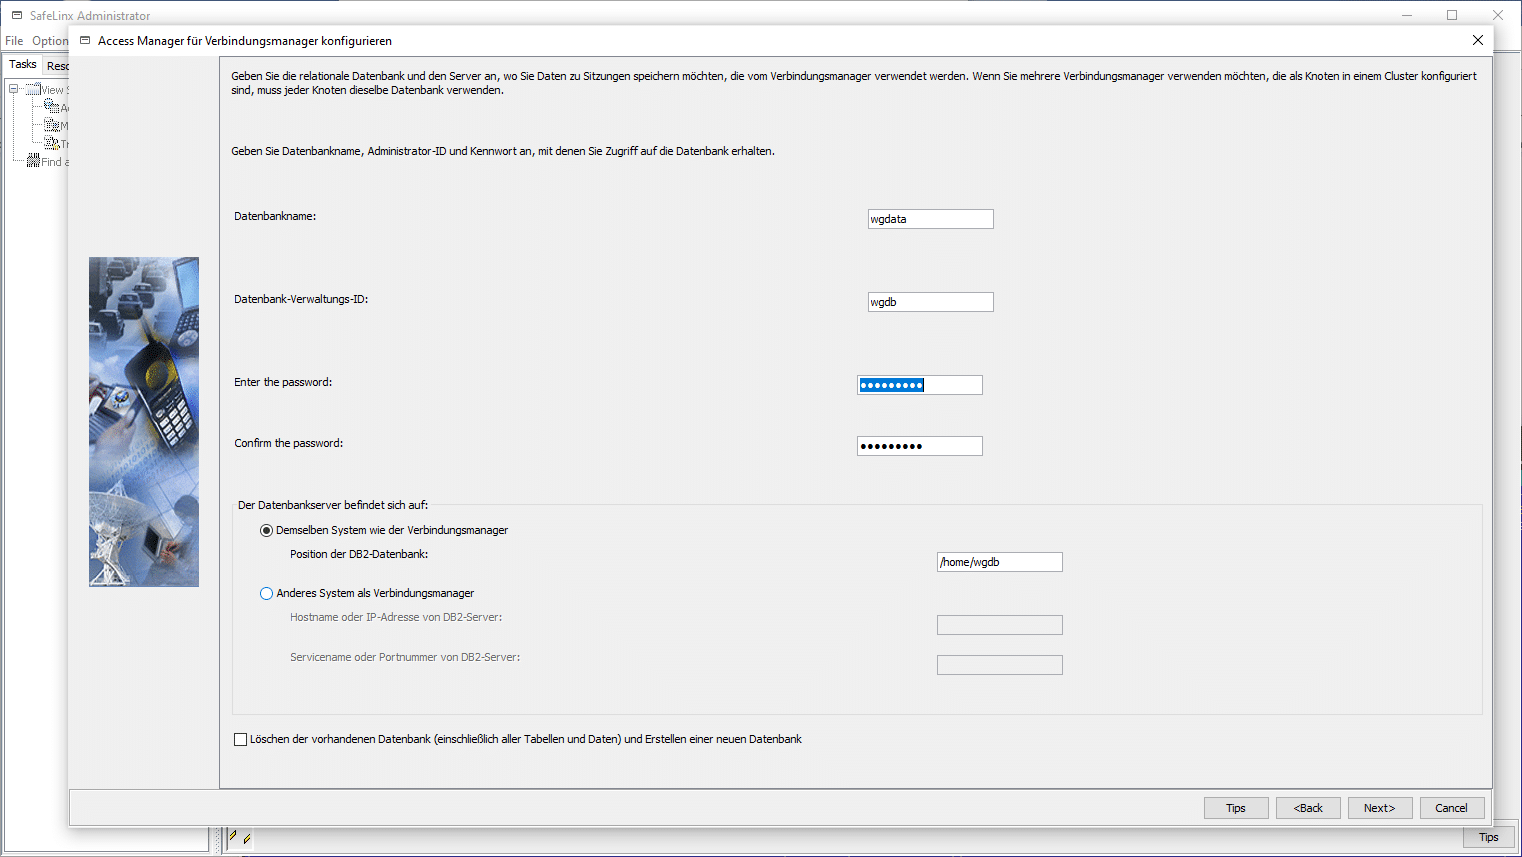
In the following, passwords are assigned for the DB2 instance that SafeLinx is to use (can be freely selected).
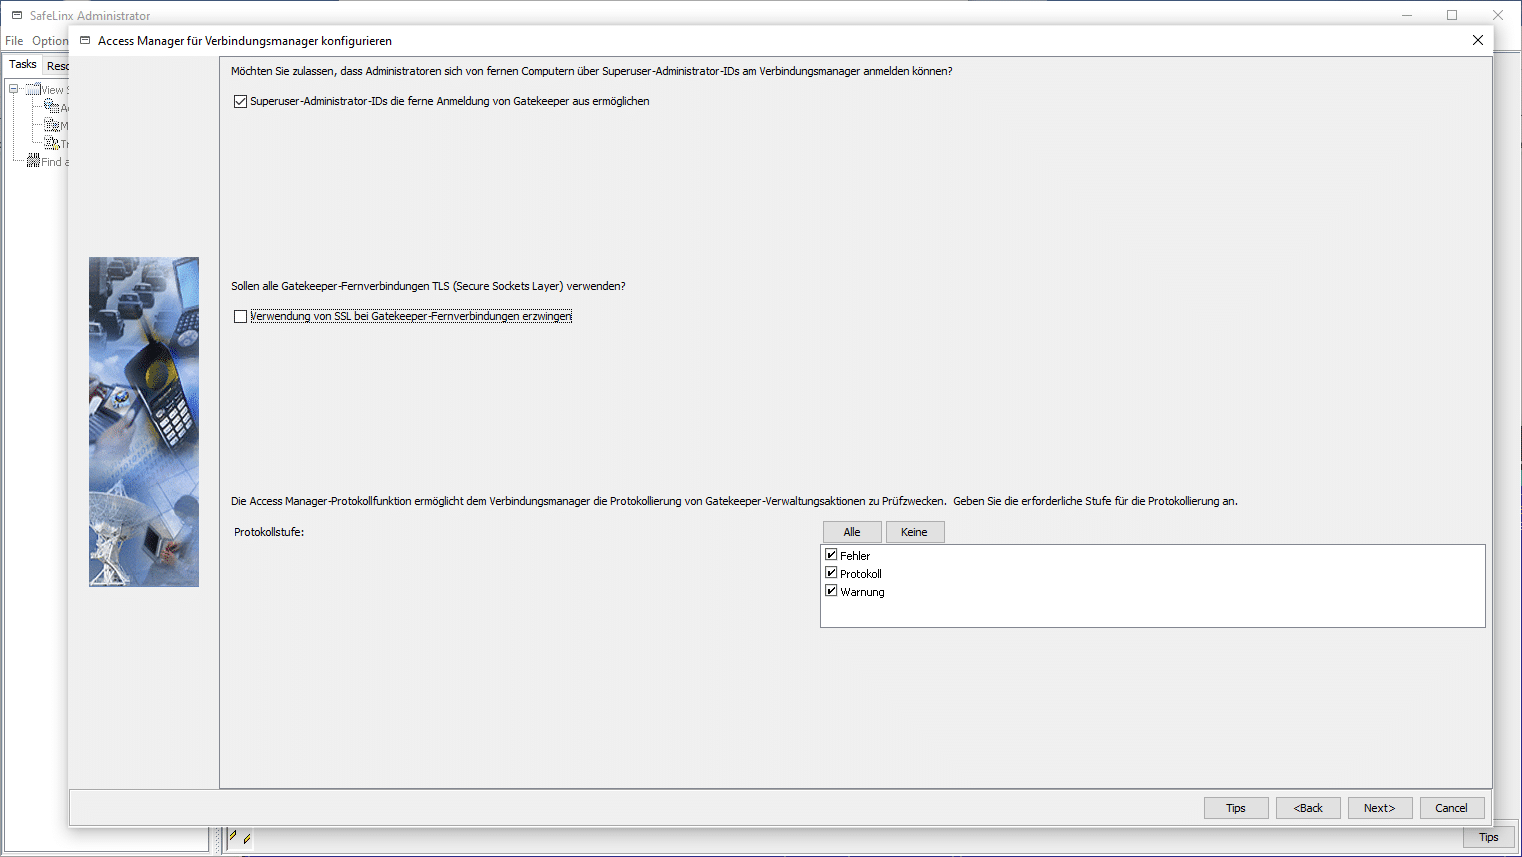
I’d recommend selecting all three items for the log level (error/log/warning) at the beginning and proceed.
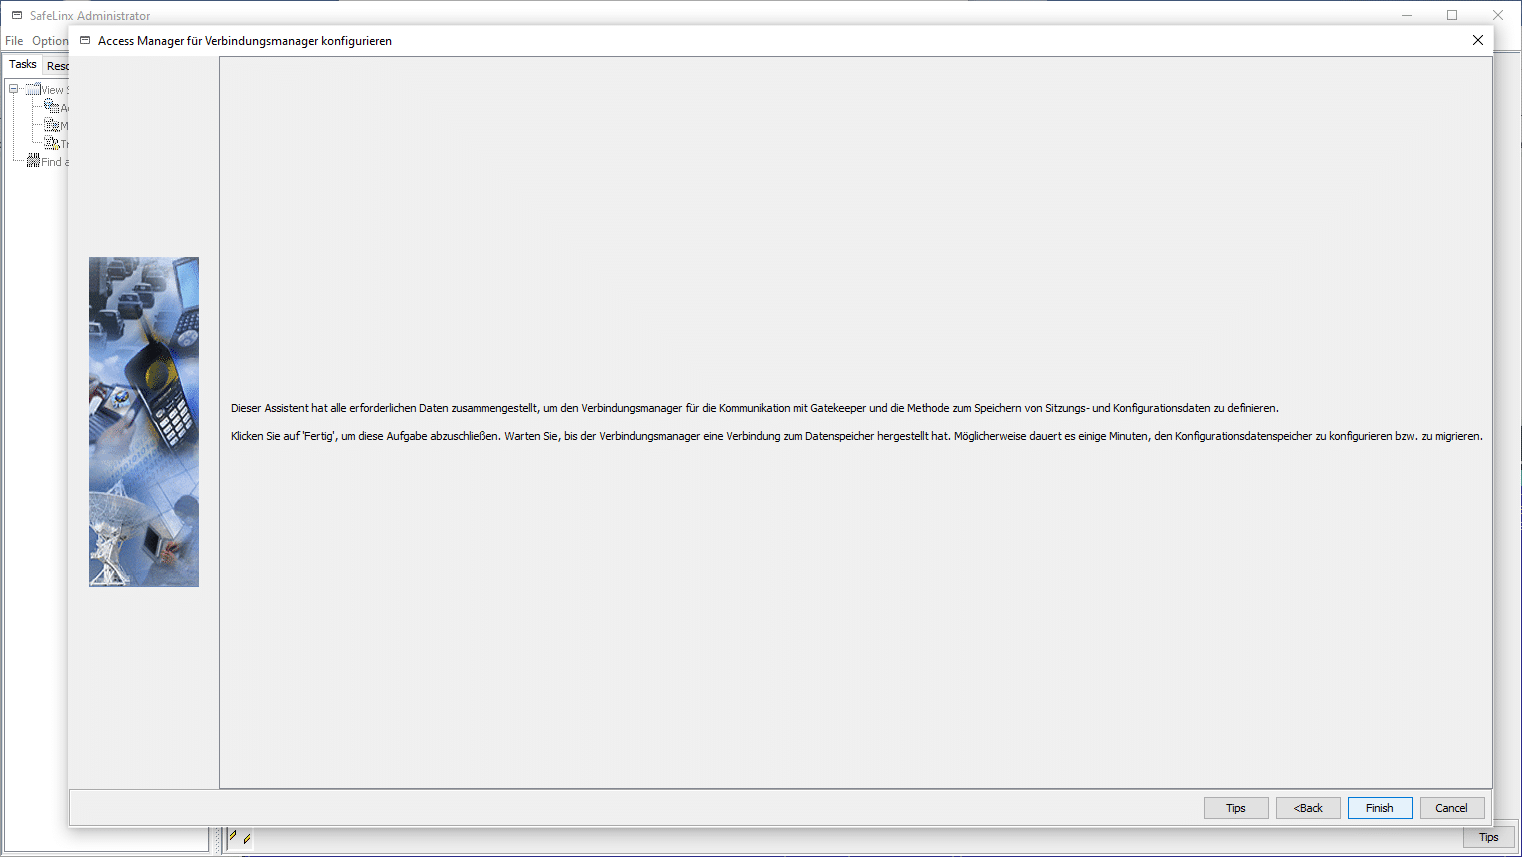
The basic setup is complete.
You will also be asked if you want to set up your own user or password.
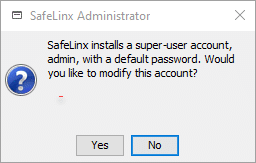
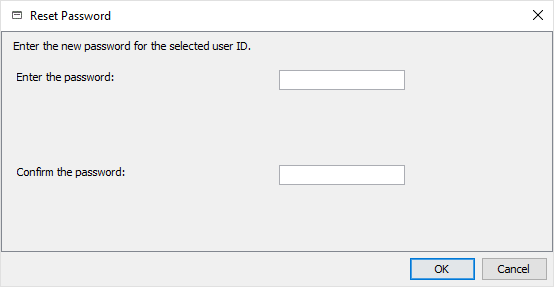
Please confirm this window with “Yes” and assign your own SafeLinx password for the “Access Manager” and confirm with “OK”.
One of the last steps asks for the FlexNet License Server. As no entry or connection to the FlexNet License Server is necessary at this time, the question can be rejected.
Safelinx Server Node Setup
The last step for today is to create and activate the Safelinx node.
The wizard for adding another SafeLinx Server node appears after the last question about the FlexNet Server.
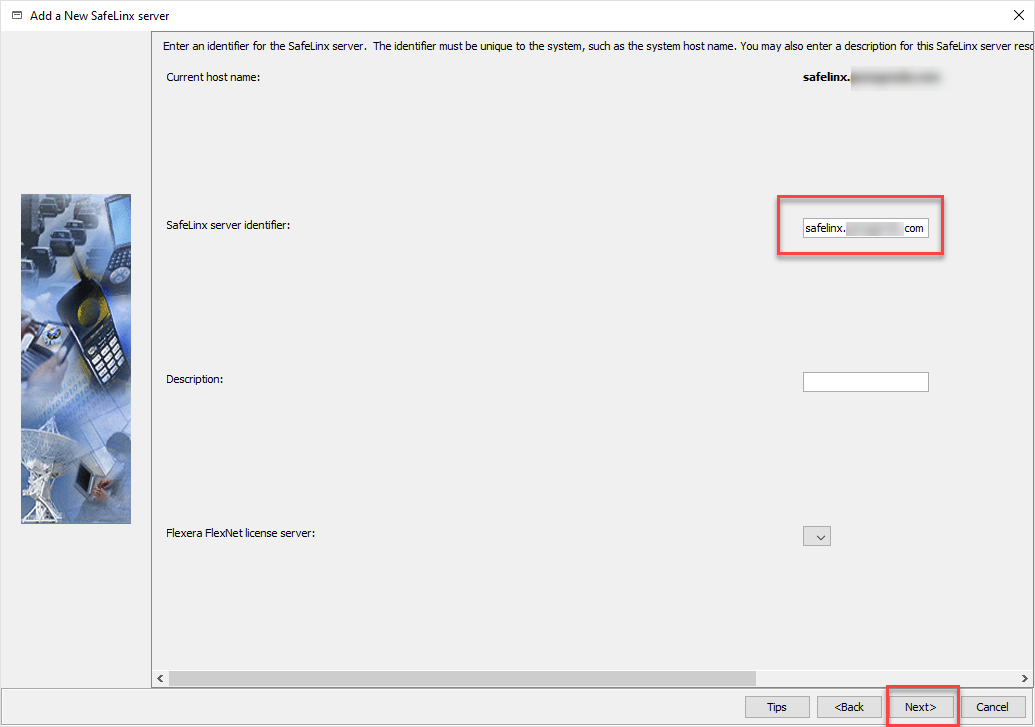
Only the DNS name of the SafeLinx Server under which the logical machine is accessible should be specified here.
Simply leave it in the hierarchy as highlighted and confirm with “Next”.
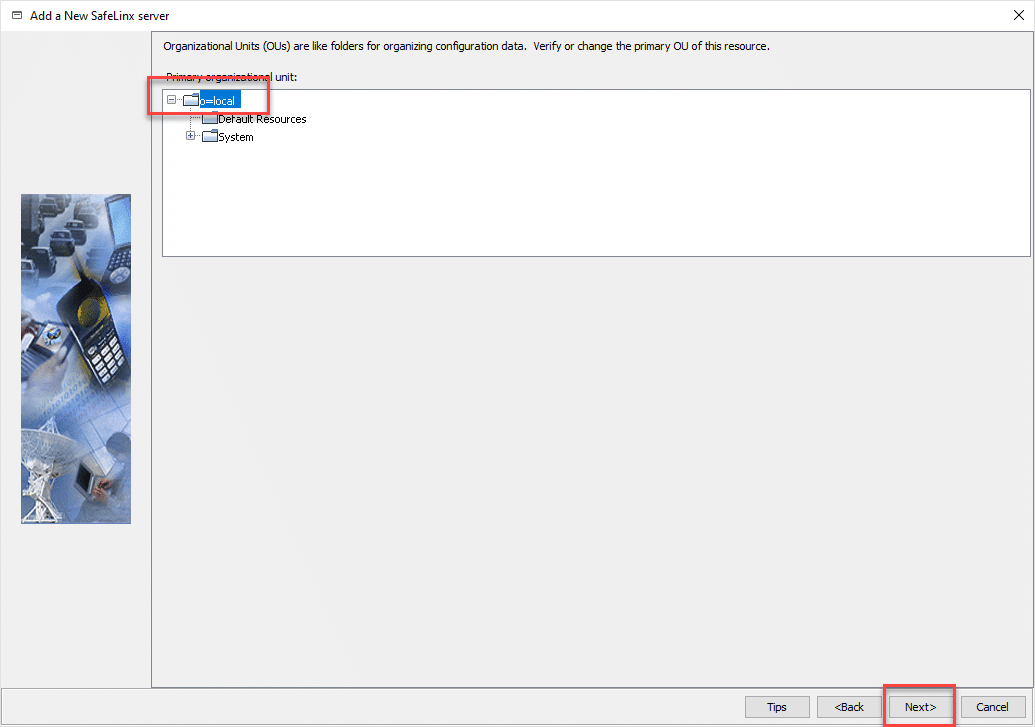
This completes the setup of the node.
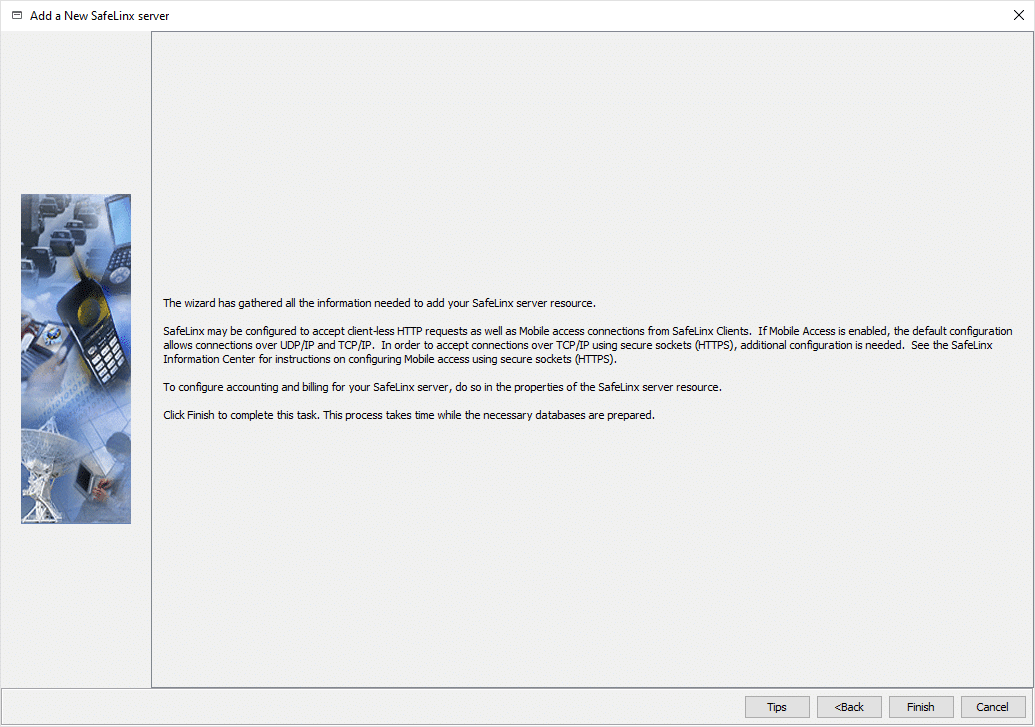
There are a few concluding questions that you answer as follows.
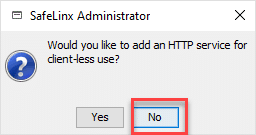
We will discuss the http service in more detail in the next part of our blog series. There you will also find the corresponding configuration for HCL Nomad. Unless you want to proceed without us, please answer with “No.”
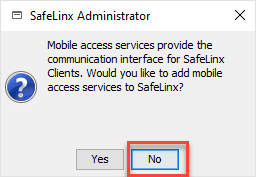
As we do not need mobile access in our scenario, answer this question with “No” too.
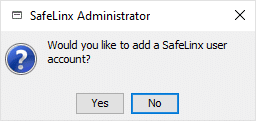
You can define additional users for the SafeLinx Server here. However, this can also be done at a later time without any problems.
We are now asked whether we want to start the SafeLinx Server.

Of course we would like to start it. Please select “Yes” here.
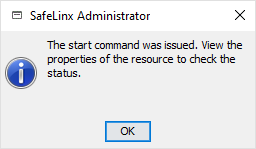
The system confirms that the start command has been sent to the server.
In the next part we will set up SafeLinx and create a configuration for HCL Nomad. Feel free to comment below with suggestions and questions. I’m glad if this article helped with the basic installation of SafeLinx.
Why SafeLinx?
Safelinx serves as a secure access point from e.g. HCL Nomad (Notes client for mobile devices like iOS or Android) to the internal Domino server structure. SafeLinx can also act as a secure access point to the internal Domino servers for HCL Traveler or HCL Verse. It is the only reverse proxy on the market that not only securely routes through for web applications (port 80/440) but also Notes (port 1352).
SafeLinx’ content is so extensive that we want to provide you with an almost seamless step by step guide. However, due to the volume, we also felt compelled to split this into two main sections:
- the installation of a SafeLinx Server (part 1 = this post) and
- the setup of a SafeLinx Server (part 2)
Requirements
A few conditions must be met for the installation of SafeLinx. Generally speaking, these are a valid SSL certificate and a dedicated server (usually in the DMZ).
I’d also recommend having the documentation of SafeLinx 1.1 at hand as a reference just in case. You can find it at: https://help.hcltechsw.com/safelinx/1.1/index.html
What does a SafeLinx Server do exactly?
Basically, a SafeLinx Server serves as a “Reverse Proxy”, as traditionally known from a web server.
SafeLinx is also able to act as a web proxy, but in this case it accepts NRPC packets (port 1352), i.e. the Notes protocol, and forwards these packets inwards through the DMZ to a Domino server.
In addition to Nomad, SafeLinx can also serve as a central entry point into the DMZ for the following HCL products:
- HCL Nomad
- HCL Sametime
- HCL iNotes
- HCL Verse
- HCL Notes Traveler
Better still, SafeLinx can be used free of charge by HCL customers who have switched to or are already using the CCB license.
The Components
In my case I have used the following components:
| Operating System: | CentOS 8 |
| SafeLinx Server 1.1: | HCL-SafeLinx-110-x86_64.tar.gz |
| DB2 express -C: | v11.5.4_linuxx64_server_dec.tar.gz |
| SafeLinx Administrator: | HCL-SafeLinx-Administrator-110-x64.exe |
First though, a word about the data store used
Besides DB2, you can also use Oracle (Linux) or MS-SQL (Windows). You can find which versions exactly in the Release Notes.
When testing and/or in a small environment of up to 100 users, however, you can also work only in the file system without a dedicated data store. The SafeLinx administrator asks whether the file system should be used as the data store when started for the first time.
In this constellation, none of the above database products need to be installed in advance.
Installation DB2
It’s beneficial to have a GUI available on the Linux server to use DB2 as data store. Alternatively, it’s possible to loop through the GUI via X11 and SSH, but I didn’t want to make it too complicated here.
Installing DB2 under CentOS 8
I chose the easy option by using the suggested “Default” under CentOS8.
yum groupinstall "Server with GUI"Subsequently, the GUI can be started via “startx”. The installation and setup of the DB2 Express-C instance is then executed directly from the unpacked package.
"./db2setup"starts the setup of the DB2 server. The individual steps for the installation are not very extensive and can be performed quickly.
In the second step, select a typical DB2 installation.
Specify the passwords for administrator users in the following two windows of the setup wizard.
Although these passwords are not required later for the connection to the DB2 data store, they should be documented securely like all passwords. The installation itself can take some time as the package is quite large (approx. 2 GB).
Once the installation is completed successfully, we can finish this first step.
The DB2 instance is now installed and can be used immediately.
Installing SafeLinx Server (Linux)
Immediately afterward, we install the SafeLinx Server. For this, we change to the already unpacked package on the server.
./install_wgProvided the check was successful, the installer searches for the DB2 server and indicates which version it has found.
Finally, you will be asked whether the SafeLinx Server should be started automatically when booting the machine. Please confirm this with “Y”.
The installation of the SafeLinx Server and thus the central server components is now complete.
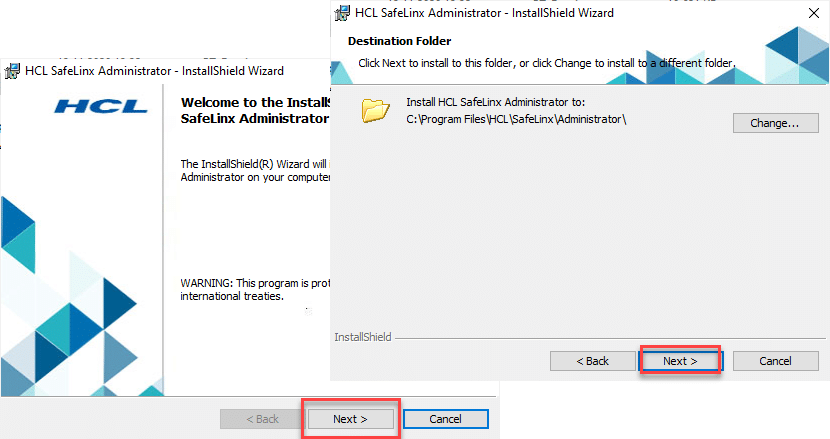
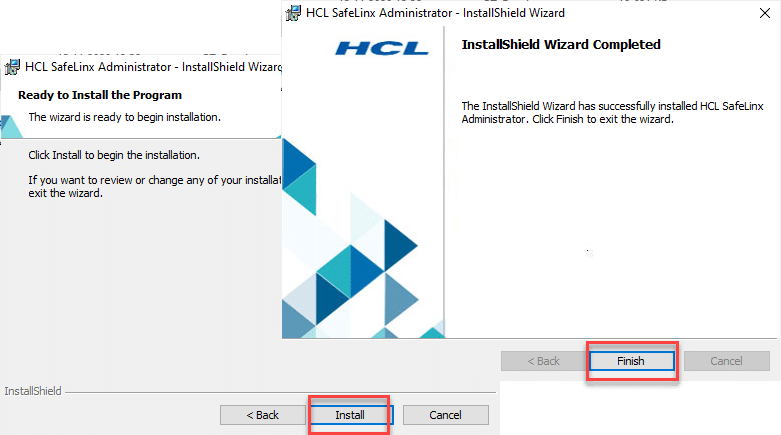
Installing the SafeLinx Administrator
The SafeLinx Administrator is responsible for the administration and handling of SafeLinx Servers. This SafeLinx Administrator can be used under Windows as well as Linux. This is a Java-based tool.
For this example, I will install it under Windows.
The installation is usually very fast.
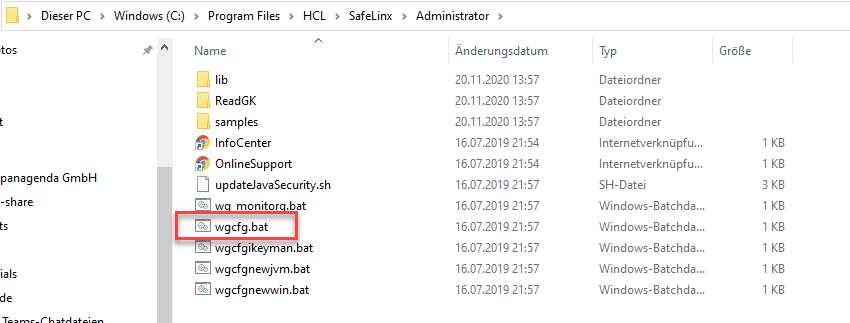
As mentioned earlier, SafeLinx Administrator is JAVA based and not a regular Windows program.
As such, you don’t start an “EXE” but a batch file.
Basic setup SafeLinx Administrator
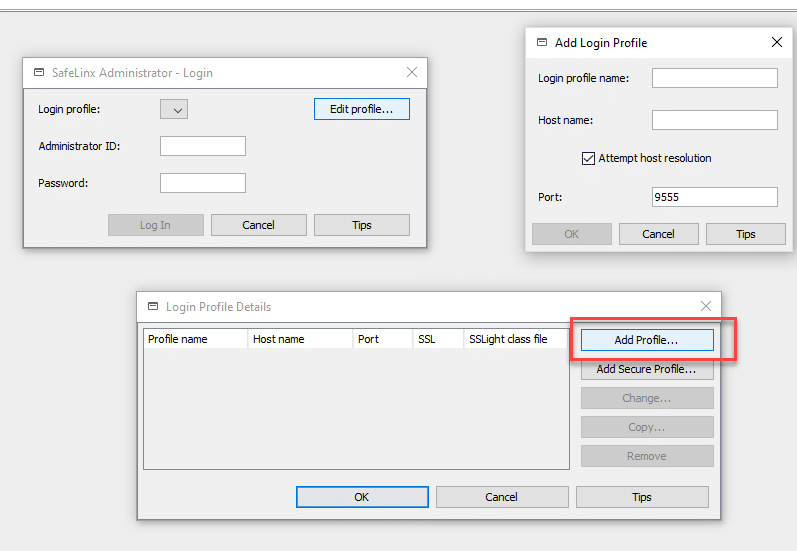
We can start SafeLinx Administrator immediately after the installation. We have to create a “Login Profile” at initial startup.
A “normal” profile must be created at initial startup. You can also use the IP address of the SafeLinx server if you do not have a DNS name for the server that can be resolved.
The default password is: “sl4!admin”
Unfortunately, this is not so obvious in the documentation. The username is “admin”.
The first dialog occurs after log in where SafeLinx guides us through the basic setup.
After confirmation, the data store is queried and here we select the ODBC interface for the DB2 connection.
In the following, passwords are assigned for the DB2 instance that SafeLinx is to use (can be freely selected).
I’d recommend selecting all three items for the log level (error/log/warning) at the beginning and proceed.
The basic setup is complete.
You will also be asked if you want to set up your own user or password.
Please confirm this window with “Yes” and assign your own SafeLinx password for the “Access Manager” and confirm with “OK”.
One of the last steps asks for the FlexNet License Server. As no entry or connection to the FlexNet License Server is necessary at this time, the question can be rejected.
Safelinx Server Node Setup
The last step for today is to create and activate the Safelinx node.
The wizard for adding another SafeLinx Server node appears after the last question about the FlexNet Server.
Only the DNS name of the SafeLinx Server under which the logical machine is accessible should be specified here.
Simply leave it in the hierarchy as highlighted and confirm with “Next”.
This completes the setup of the node.
There are a few concluding questions that you answer as follows.
We will discuss the http service in more detail in the next part of our blog series. There you will also find the corresponding configuration for HCL Nomad. Unless you want to proceed without us, please answer with “No.”
As we do not need mobile access in our scenario, answer this question with “No” too.
You can define additional users for the SafeLinx Server here. However, this can also be done at a later time without any problems.
We are now asked whether we want to start the SafeLinx Server.
Of course we would like to start it. Please select “Yes” here.
The system confirms that the start command has been sent to the server.
In the next part we will set up SafeLinx and create a configuration for HCL Nomad. Feel free to comment below with suggestions and questions. I’m glad if this article helped with the basic installation of SafeLinx.