
Just How Easy Can Upgrading Be?
We’ve talked a lot about how we want to make upgrading to IBM Notes 10.0.1 easy for you, and we think we’ve done just that! This blog post will give you a high-level overview of what needs to be done to successfully upgrade from Notes 6.x or greater to Notes 10.0.1.
Before You Get Started.
As with any upgrade, there is some groundwork you need to have in place before you can begin. It’s not much, but it’s essential.
- You’ll need to be running IBM Notes version 6.x or newer.
- A version of MarvelClient (Essentials or Basic) must be installed on at least one Domino server in your environment as well the clients you want to upgrade.
- If you’re a MC Essentials customer, you’ll need your MC Free Upgrade license key. (If you don’t have one already, you can get one here.)
- If you’re using a premium variant of MarvelClient, you don’t need a key.
- And of course, you’ll need the installation packages you want to deploy available on your admin computer.
Start Your Engines!
The process for activating MC Free Upgrade depends on your customer type.
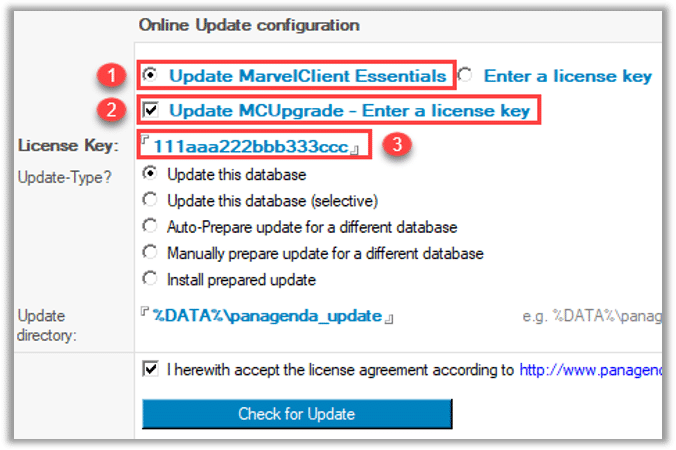
If you’re an MC Essentials customer, you just enter your key into the MarvelClient Online Update Menu as you see here.
If you’re already using a premium version of MarvelClient, life is even easier. We’ve already added MC Upgrade Free to your license. All you need do is run an “Online Update”.
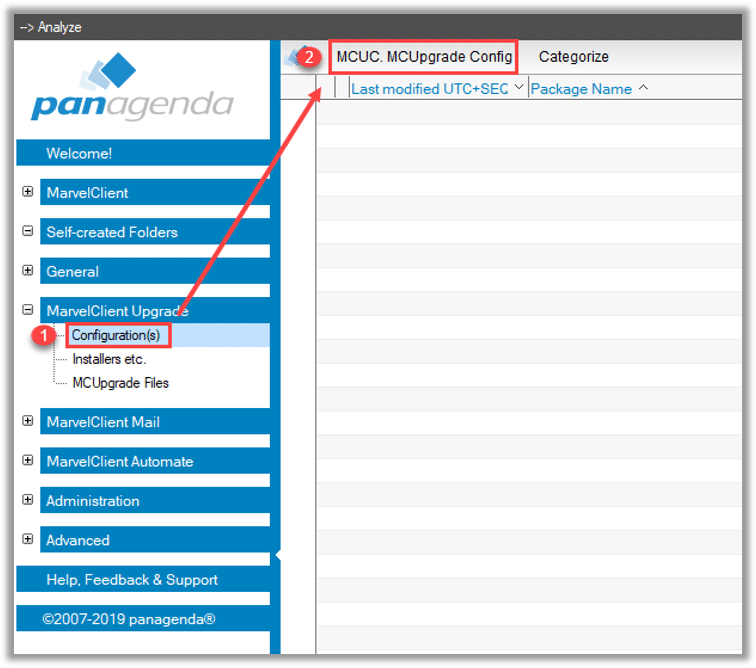
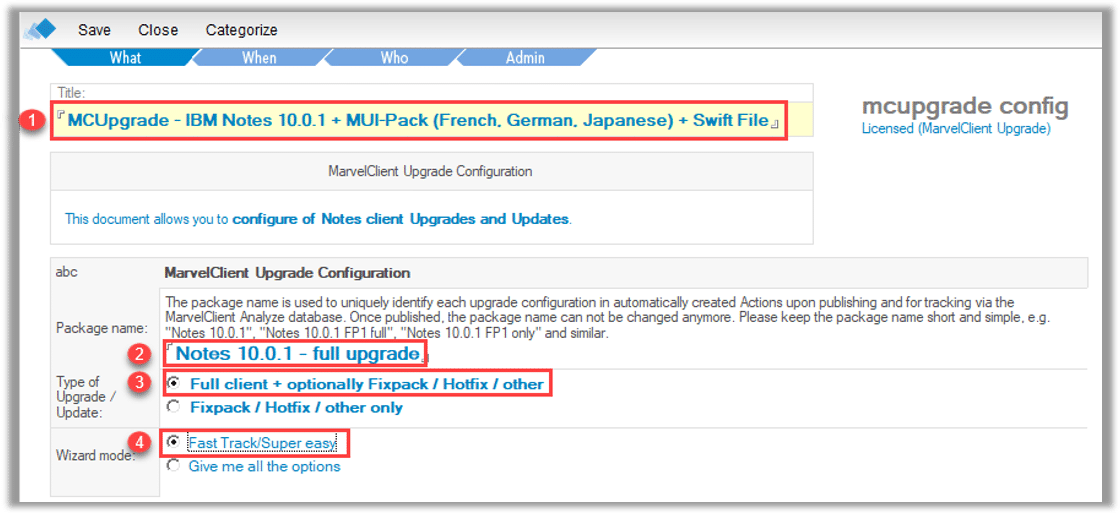
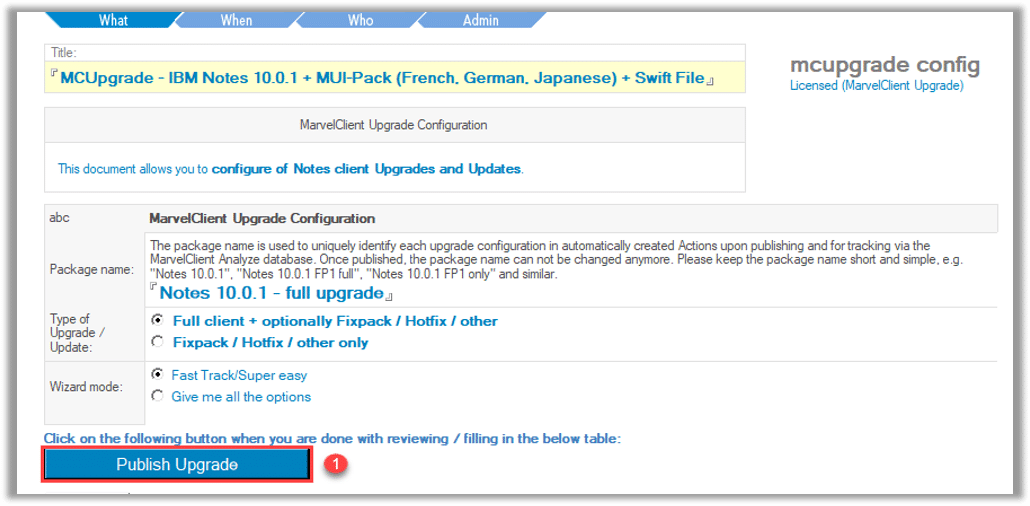
Step 1 – Creating an “Upgrade Configuration” Action
Make sure you specify a “Title” and “Package Name”! You’ll also need to select the appropriate “Type of Upgrade/Update” and “Wizard Mode”.
Step 2 – The Distribution Tab
You’ve got the option to let MarvelClient handle the distribution, or to use our own method.
If you want MarvelClient to do this for you, you’ll need to source from which the clients will download the upgrade package. This could be a file path or a URL.
If you’ve got multiple download locations, we can handle that too.
From this tab, you can also import the installation packages and select them for the current “Upgrade Configuration”
Here’s an example using a UNC path:

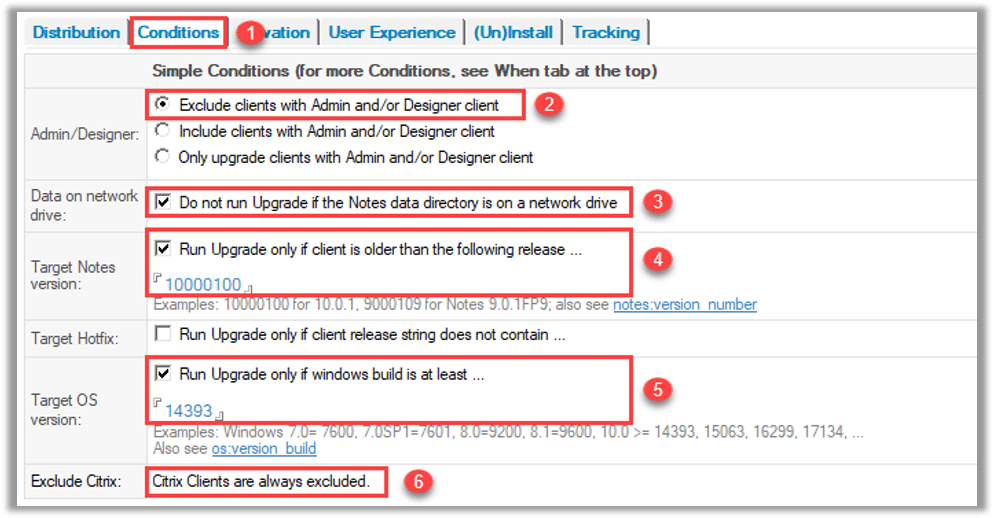
Step 3 – The Conditions Tab
We think you’re going to like what you can do here! We’ve given you the power to define conditions you can apply to your upgrade configuration.
We’ve used just a few in the example below, but you’re not limited to just these:
- Only for non-Admin and/or -Designer clients
- If the Notes Data Folder is not on a network drive
- If the current IBM Notes Client version is smaller than 10.0.1
- On Windows10 computers
- On non-Citrix clients
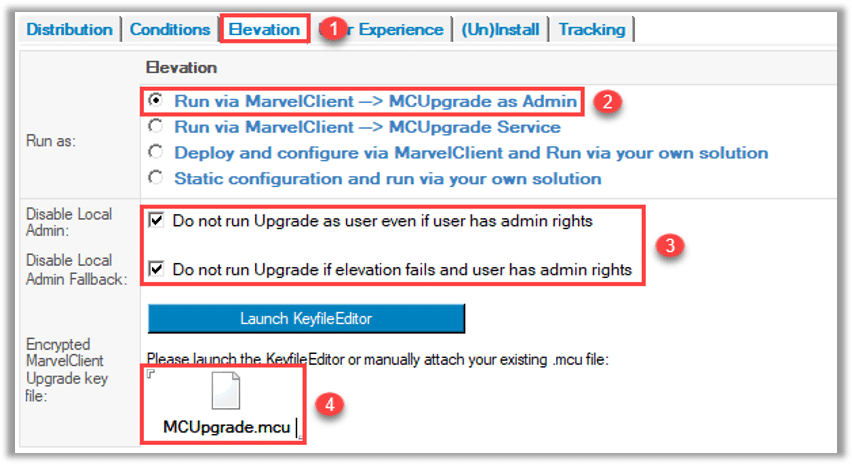
Step 4 – The Elevation Tab
Our experience shows more than 95% of users don’t have local admin rights. If this is true for you, we have a solution.
MarvelClient supports 4 different methods:
- Run via MarvelClient à using a local or domain account with local administration rights
- Run via MarvelClient à using MarvelClient Upgrade Windows Service
- Deploy and configure the Installation Package with MarvelClient and run via your own solution
- Static configuration and deploy and run via your own solution
Here’s an example where the Elevation Tab has been setup to use option 1 from above.
We select this option and the “Disable Local Admin” and “Disable Local Admin Fallback” to ensure that the Upgrade will only be done with the provided user in the .mcu file.
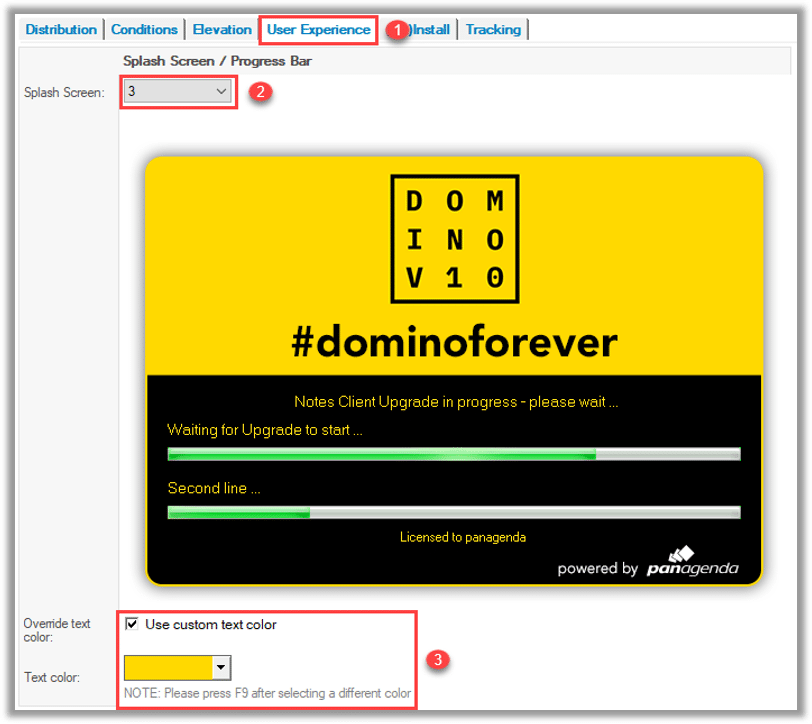
Step 5 – The User Experience Tab
Why not add a little splash for your users? During the upgrade process, a splash screen will be displayed along with some progress bars. You can choose from 10 different designs as well as the font color.
Check it out!
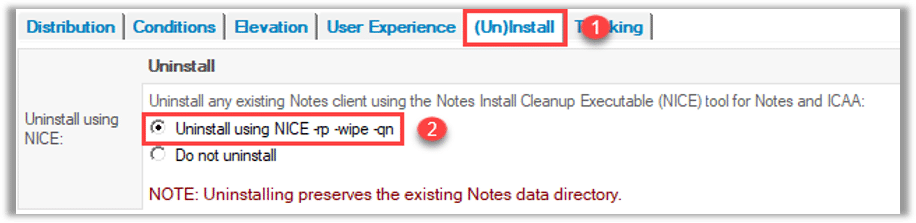
Step 6 – The (Un)Install Tab
You’ll want to pay attention here. This is one of the most important tabs in the MarvelClient Upgrade Wizard.
Here you control:
- Whether the current client will be uninstalled before the new installation gets executed,
- The exact command lines of the Notes client, and
- The additional install packages and their sort order.
For upgrades, we suggest you do a clean install, by first uninstalling your current IBM Notes clients using NICE.
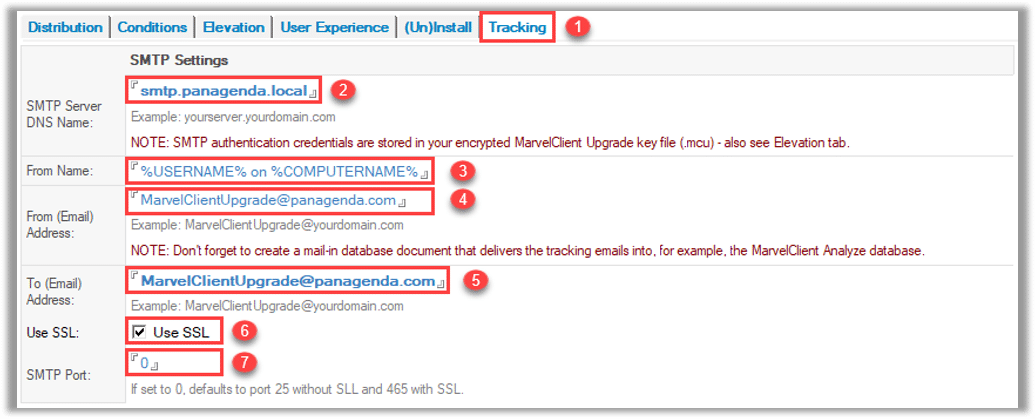
Step 7 – The Tracking Tab
Stay informed about the progress your making by using the Tracking Tab. You can get interim progress messages as well as “success” and “fail” notifications. These are handled via SMTP, so you’ll need to enter the usual information required to send an email.
Step 8 – Publish Upgrade
You’re almost done! Publishing the “Upgrade Configuration” creates everything MarvelClient needs to upgrade your current version of Notes to 10.0.1.
Don’t forget to check the When and the Who tabs.
The “When” tab is where you can manage additional conditions for the resulting upgrade actions.
The “Who” tab, is where you can specify who will execute (Include/Reader) or not execute (Exclude) the client upgrade.
If you don’t manage these tabs à no additional conditions + everybody will get the client upgrade!
Step 9 – You’re Done!
Ok, in the practice you’ll see there are a couple more things you’ll need to do. But, as we said at the beginning, this is a rough guide, and it gives you a good overview of what to expect.
We hope you enjoy your upgrade to IBM Notes 10.0.1. We’d love to have your feedback.
So, get in touch and let us know what you think!
